Query Manager
The Query Manager is a unique and powerful tool, which allows the user to query the member database using custom designed queries. The custom queries support complex 'and/or' logic. Custom queries can be saved for repetitive use.
Contents
Benefits
The Query Manager can be used to:
- Filter the Member List
- Create Billing records
- Generate custom reports
- Send targeted emails
Interface
To launch the Query Manager, click on the Query Manager menu item, which appears under the Reporting group
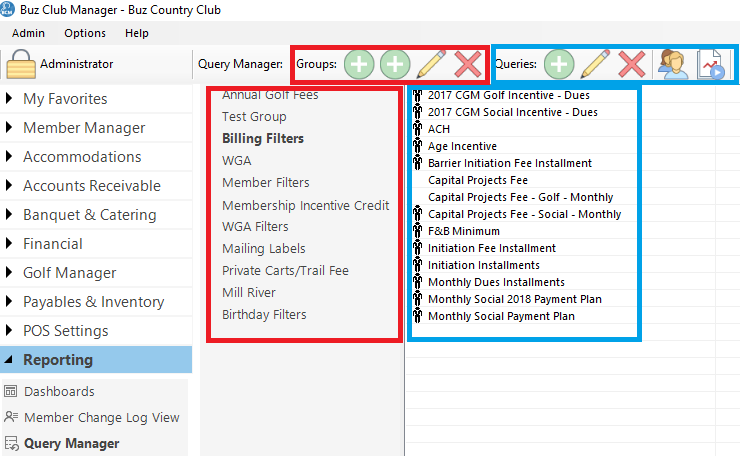
Tool Bar
The Tool Bar is divided into two sections
Groups (outlined in red)
- Add Group
- Add Child Group
- Edit
- Delete
Queries (outlined in blue)
- Add Query
- Edit Query
- Delete Query
- Toggle Member List Filter
- Test Query
Query Groups (outlined in red)
Query groups are listed in the left hand panel in tree view.
Queries (outlined in blue)
When you select a query group, all of the queries associated with that group are listed in the Queries panel. Queries which have been designated as a member list filter in the Member Manager, have an ![]() icon to the left of their name.
icon to the left of their name.
Managing Query Groups
To simplify the organization of Queries, the Query Manager provides for the creation of groups and sub groups (categories and sub categories). Top level groups are called Groups and sub groups are called Child Groups.
Add a Query Group
To add a Query Group, click the Add Group button on the Tool Bar.

Enter the name of the group and click OK.
Add a Query Child Group
To add Child Groups, click on the Parent Group in the Group panel and select Add Child Group from the Tool Bar. Enter the name in the Query Group Editor and click OK.
Modify/Delete Groups
To edit or remove a group (both Parent and Child), click on the group in the Group Panel and click on the desired action on the Tool Bar.
Note: If you delete a Query Group then all of the queries which are contained within that group will be moved to an Unassigned Group.
Managing Queries
Add Query
To add a new Query, click on the Group under which it will appear, then click the Add Query button on the Tool Bar.
Complete the Name and Description fields. If the query will be available as a member filter, check the box Use As Member List Filter. Next proceed to add conditions
Add Conditions
To add conditions, click on the Add button in the Query Editor.

Next click on the button to the right of the 'Field Name' field.
.PNG)
There are condition groups in a tree view. Expand the group in which your condition variable exists.
.PNG)
Click on the variable name and then click OK.

Click the drop down arrow for Comparison

Select the Comparison. Next click the drop down arrow for Compare Value.

Select or enter the Compare Value and then click Save.
Note: The Comparison and Compare Values are context sensitive to the Field name selected.
Repeat the steps above to add additional conditions.
After all of the conditions have been added, Save the query
And/Or Logic
The Query Manager supports complex And/Or logic.
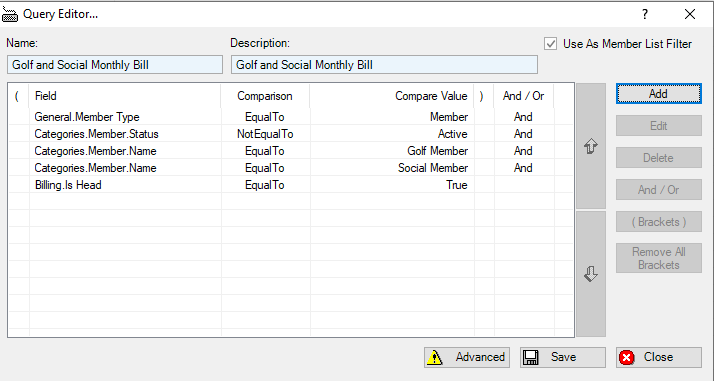
As you add condiitons to a query they are all added as 'And' conditions. For simple queries, all 'And' conditions may work fine. By way of example in the query below, the Query Manager will return a list of members whose member status is Active and who are the head of group (family).
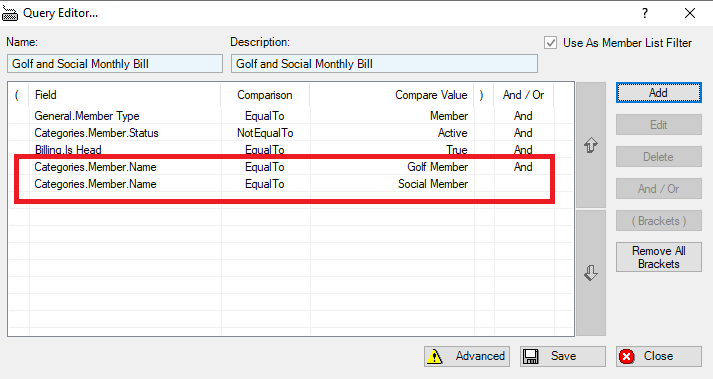
However, the following query will return no results because a member cannot be in 2 member categories.
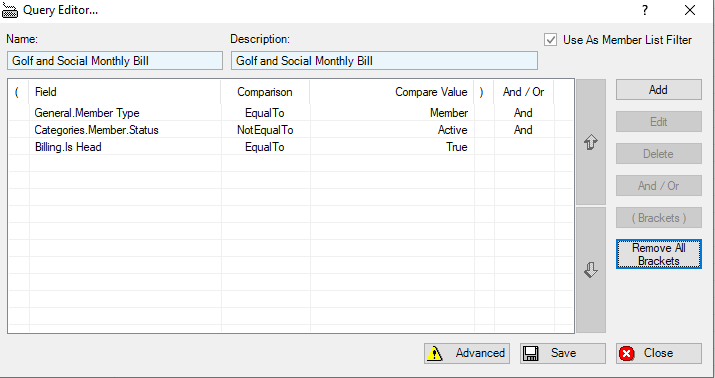
We are going to change the above query by grouping the member category name conditions and changing the condition from 'And' to 'Or' as follows:
Step 1: Click on the Advanced button
Step 2: Click on the first member category name condition, then hold down the Shift key and click on the last member category name condition.

You will notice that the (Brackets) button is enabled. Click on the (Brackets) button.
Step 3: The will be a '1' in the ( column beside the fist highlighted condition and a '1' in the ) column beside the last condition.
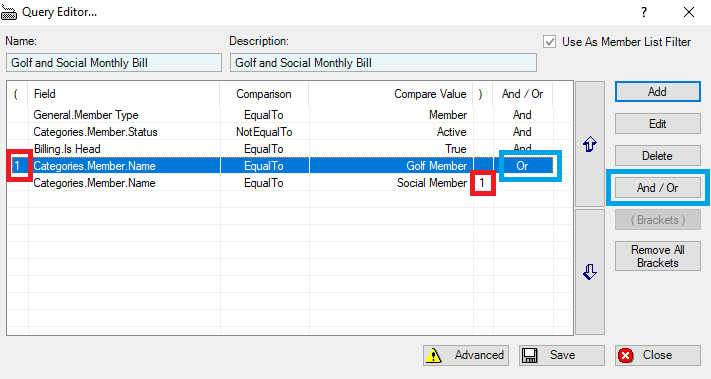
Click on the first line in brackets and then click on the And/Or button to change the condition to 'Or'. Repeat this step for all on the conditions between the brackets, except for the last one.
Lastly, Save the query.
Testing a Query
To test a query, clcik on the query in the list of queries and then click on Test Query button on the Tool Bar. A list of affected member will appear. You can export the list using the Export button.
