
Credit Book
To open the Credit Book menu, select Options/ Point of Sale/ Credit Book. You will need to log-in with the credentials provided for you. The following window will open:
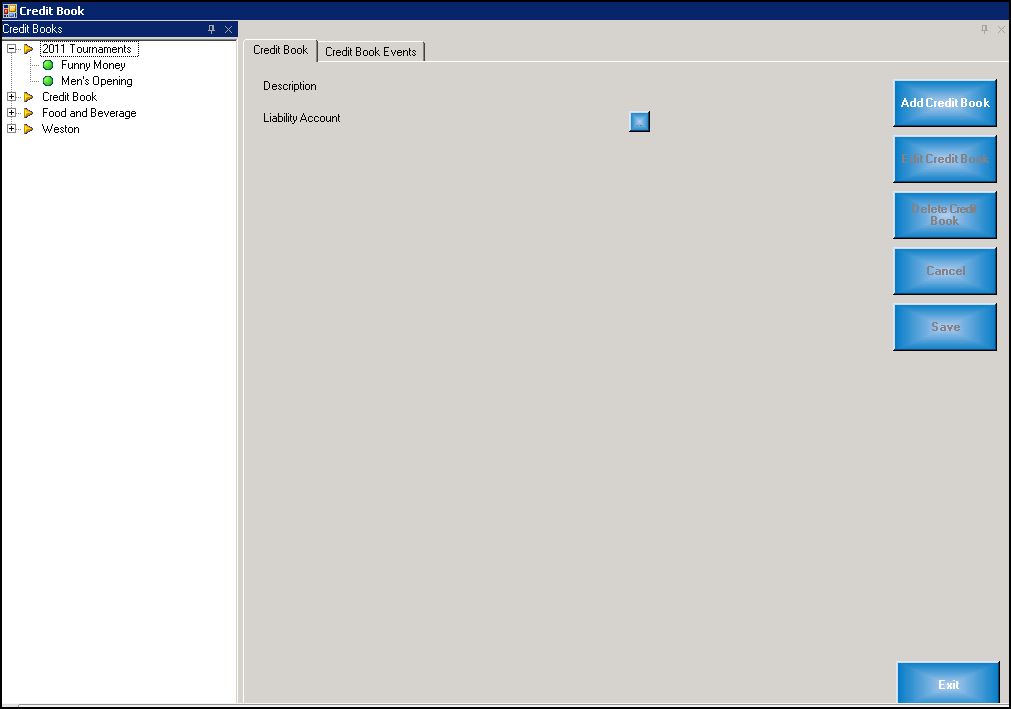
The Credit Book contains the list of credits which can be used in the Point of Sale system. The credit book inventory includes events such as "Men's Opening" (as seen in the image above). The event may have included prizes that were won towards items in the retail or F&B POS system. For example, if someone won a golf tournament and won $50.00 towards golf equipment from the Pro-shop, this would be included in the Credit Book.
Each item in the Credit book inventory is assigned to a POS profile where the credit is able to be used.
Adding a Credit Book:
To add a Credit Book to the inventory list, simply click on "Add Credit Book" in the menu to the right. You will be prompted to enter a Description:
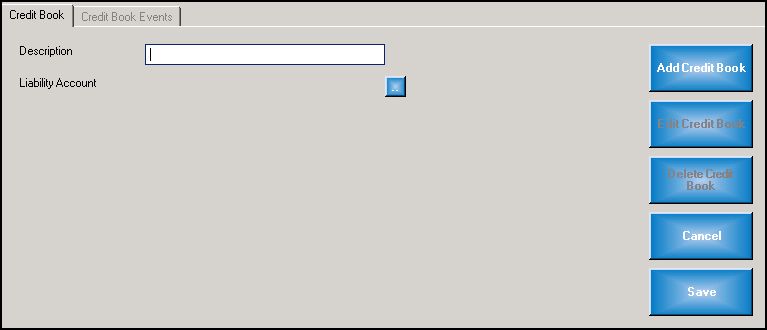
Once you have entered the desired description, you have the option to tie this Credit Book to a liability account by clicking the small box next to "Liability Account" in the menu. Once you have completed entering the information, click on "Save". If you do not want to save, click on "Cancel".
To Edit a Credit book, simply select it from the inventory menu and click on "Edit Credit Book" in the menu to the right. Once you have finished making the desired changes, click on "Save". If you decide not to make any changes, click on "Cancel".
To Delete a Credit book, simply select it from the inventory menu and click on "Delete Credit Book" in the menu to the right. When prompted, confirm that you want to delete the Credit Book.
Adding a Credit Book Event:
To add a Credit Book Event, select the second tab at the top of the menu on the right. Click on "Add Event" and enter the description, as prompted. You can tie an Expense Account to the Event by clicking the small blue box next to "Expense Account". Next select whether you want the event to be visible by toggling the checkbox. Once you have entered the necessary information, click on "Save". If you do not wish to save the event, click on "Cancel".
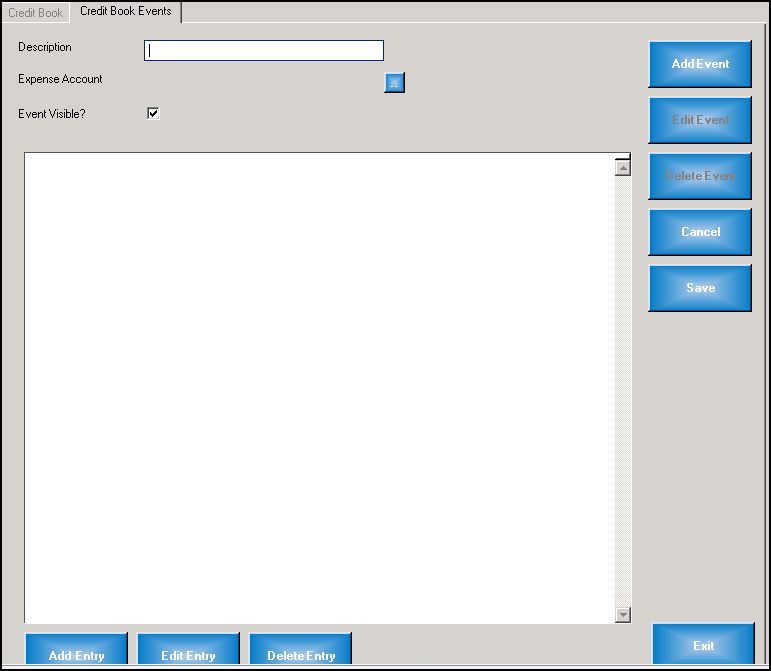
Once you have saved the Event you can select it from the Inventory List and Edit the Event, Delete the Event and add Entries to the event.
To Edit the Event, select it from the Inventory List and click on "Edit Event" in the menu on the right. Make the necessary changes and click on "Save". If you do not want to save the changes click on "Cancel".
Do Delete the Event, select it from the Inventory List and click on "Delete Event" in the menu on the right. When prompted, confirm that you want to delete the event.
Adding an Entry to the Event:
To Add an Entry to the Event, select it from the Inventory List and click on "Add Entry" at the bottom of the menu on the right. The following pop-up menu will appear:

Each entry in an event is one specific Credit that is given/awarded relevant to that event/inventory item.
Member: You must assign the Entry to a member (eg: For the Men's Opening, the person who won the prize that this entry refers to). To select a Member, click on the small blue box and select the member from the pop-up list of all members. The list is alphabetized by last name. Once you have selected the name from the list, click on "OK"
Created Date: This will usually be "today", the day in which you are creating the entry.
Expiry Date: If you want to limit when this credit can be used, select an expiry date. After this date the Credit will no longer be valid in POS. You may wish to do this if the member must use the credit before the end of the year, or the season.
Enforce Expiry: To enforce the Expiry Date, as selected above, toggle the checkbox on. This will force the credit to expire after the selected date.
Amount: Enter the dollar amount that the credit is valid for (eg: If the winner of the Men's Opening wins $50 credit, the amount would be $50.00).
Once you have saved the Entry information you can add another Entry following the same process (this is useful for events with multiple awards etc.), Edit the Entry, or Delete the Entry.
To Edit the Entry, select the entry from the inventory list in the menu and click on "Edit Entry" at the bottom of the menu. Make any necessary changes and click on "OK". If you do not want to make any changes, click on "Cancel".
To Delete the Entry, select the entry from the inventory list in the menu and click on "Delete Entry" at the bottom of the menu. When prompted, confirm that you want to delete the entry.